
Guns and Ships
And so the balance shifts.
On a fundamental level, using combat vehicles (primarily spacecraft) is not too different from person-to-person combat. There are some special considerations to be taken into account, with the most prominent being that multiple characters will be acting as crew on the same larger vessel.
Size Classes
There are five Size Classes that vessels may be a part of. Most humanoids fall into Class B, and a BOD score that does not include a Class letter is assumed to be Class B. Within each Size Class are BOD ratings from 1 to 10 (usually); an object with BOD rating of C10 is roughly the same size as a D1, and the difference between them is essentially just which Size Class is expected to be interacted with more often.
It's possible for an object to have a BOD rating higher than 10, but rare. Such vessels will be similarly sized to the higher Size Class vessels, but will have armor, weapons, engines, etc., usually found on the smaller Size Class. This usually results in a large, unwieldy, underpowered vessel that is trivial to disable but difficult to fully destroy. Such vessels will have much smaller engines and weapons than a battleship their size would be expected to have. Large civilian transports and space stations are the most common uses for extremely high BOD ratings.
| Class | Description |
|---|---|
| A | Small things, animals, drones, etc. |
| B | Roughly people-sized |
| C | Essentially anything from a small car up to about the size of the Space Shuttle |
| D | Most large, offensive vessels; D10 is the largest size vessel that can traverse a warp bridge |
| E | Space stations and defensive battleships; smallest moonlets (e.g. the debris comprising Saturn's rings). |
When two objects of the same Size Class are in combat, no special considerations need to be made. When two vessels of different Size Classes are in combat, the battle must have a Time Class in order to manage the way Initiative is managed. The Time Class of an encounter is determined at the beginning of each combat round based on the smallest entity involved. If, in the middle of a combat round, an entity comes into play whose Size Class is smaller than the current Time Class, it operates as part of the previous smallest existing Time Class until the next round.
Any vessel (or person) larger than the Size Class of the battle must have its Initiative costs increased to compensate. To raise the Initiative cost up by one Size Class, the cost must be doubled. If the vessel is more than one Size Class larger than that of the battle, this should be repeated; a Class E vessel in a Class C battle will have its Initiative costs quadrupled, for example. All Initiative Bank caps are increased by the same multiplier.
Any attack across Size Classes has its damage value modified to suit; doubled if a larger vessel is attacking a smaller one, and halved (round up) if the smaller is attacking the larger. If crossing multiple Size Classes, the value is doubled for each Class. The weapons of Class E vessels are devastating to Class C vessels, dealing quadruple damage if they manage to connect. This modification happens before any Armor or other resistance to the weapon's damage is applied.
Crew
When operating a vessel of a higher Size Class than themselves, every crew member is treated as a part of that higher Size Class–they must pull more levers and switches and so on to make any one thing happen. In effect, a D-Class ship's Chief Engineer makes the roll for his entire engineering team, and rolls his Initiative on the time scale of his vessel. While each crew member has one or more assigned stations, it is possible to work off-station in emergencies, at a -2 dice pool penalty. Any station which has more than one primary crew member assigned to it will likewise suffer a -2 dice pool penalty, unless an exception is noted.
Captain
The Captain is expected to lead, to strategize, and to inspire. Any decisions that must be made on behalf of the ship–for example, if there are any countermeasures to trigger–are the prerogative of the Captain unless he chooses to delegate particular duties to other officers.
Leadership (2 IP): Rolls a MAN + Influence (Leadership) test and adds hits to the Team Bank. If there are any hits in the Team Bank, they are subtracted from the above dice pool.
Tactics (2 IP): Rolls a INT + Tactics (Orbital Combat) test and adds hits to the Team Bank. If there are any hits in the Team Bank, they are subtracted from the above dice pool.
Reassign Crew (1 IP): Reassign members of the crew to take over different station(s). No test is required.
Herd Vessel (3 IP): Using a MAN + Tactics (Herding) test, the Captain attempts to trick another vessel into a particular movement, including changing Ranges or even ramming a different ship. The opposing Captain or Sensor Operator rolls PER + Tactics (Herding) + modifier to detect and overcome this trick, with a threshold equal to the first Captain's hits, and a modifier equal to the number of times the herding Captain has attempted to use herding in this encounter. If the deceit is successful, then the next time the targeted vessel moves, it will follow the plan decided on by the deceiver.
Pilot
The ship's Pilot handles all movement of the ship. All combat maneuvers use a REA + Pilot (Combat Maneuvers) test unless otherwise noted, and gain a dice pool bonus from the vessel's current Thrust Ratio. All hits from piloting tests are added to a bank specific to that Action; the usage of this bank is described with each Action. There may be multiple Pilot Banks in effect at any given time, but any piloting test has its dice pool reduced by the total number of hits across all Pilot Banks; hits from any Pilot Bank may be discarded at any time to avoid this penalty. Some maneuvers allow you to spend the bank hits, consuming them as normal; others simply use the hits in calculations (e.g. as a dice pool bonus), which does not consume them. When any enemy craft makes any piloting test where this ship is a factor, this ship's Pilot Banks all have their value reduced by the number of hits rolled on the test. Pilot bonuses are powerful, but fleeting.
Many of these Actions use the effective Thrust Ratio of the vessel as a dice pool bonus. If the vessel's normal TR is higher than the GRV tolerance of any of the crew, the crew will take the appropriate amount of physical damage for each Action taken. The Pilot may choose to operate at less than full throttle to avoid this, and certain engine types may negate this effect entirely.
All Actions by the Pilot station generate Waste Heat, if the engines are of a kind that generates Waste Heat. See the "Waste Heat" section on the online edition later in this chapter for more information.
Offensive Positioning (2 IP): The Pilot repositions the vessel, making attacks more effective. This bank may be used as a positive dice pool modifier on attack rolls, or may spent as hits to target specific systems.
Defensive Maneuvers (2 IP): The Pilot positions the vessel to make itself difficult to target from a particular vessel's weapons arrays. This bank may be spent by the captain as a countmeasure (see "Evasive Maneuvers" on Guns and Ships).
Defensive Roll (2 IP): The Pilot rolls the ship to protect the more vulnerable or already damaged areas. This bank's hits effectively add to the ship's Armor.
Flank (2 IP): The Pilot maneuvers the vessel to flank an opponent along with an allied vessel. As long as the ally is in combat and attacking the same target, this bank is added as a dice pool bonus to any attack roll by either vessel. In addition, the target may not take advantage of the Defensive Roll Bank to soak damage.
Escape Theater (2 IP): Attempts to accelerate away from an encounter. This test uses REA + Pilot (Deep Space Maneuvering), and the bank is the threshold a pursuer must achieve to follow them. After two Initiative rolls are made without a successful pursuit, this vessel is considered to have left the battle.
Pursuit Course (2 IP): Follows an enemy that has made an Escape Theater Action. The Pilot rolls REA + Pilot (Precision Spacecraft), and must meet the threshold set by the fleeing vessel's Escape Theater Bank. This threshold is modified by (runner's TR - pursuer's TR).
Match Course (2 IP): Available only as an Interrupt Action during another vessel's movement, this Action will attempt to match its movement, canceling out any effect. Any hits on this test reduce a targeted bank of another vessel.
Change Range (2 IP): Changes Ranges from Rendezvous to Docking Range with a particular vessel, or vice versa. When this test is rolled, the bank from this test is used as a threshold for any vessel to counter it. For example, the hits on a test too close to Docking Range are the threshold for the target ship to keep it at Rendezvous Range on its next turn. Just like pursuit, the difference between the vessels' TRs is a modifier for this threshold.
Ramming Speed (2-4 IP): Really, it's more a direction than a speed. The Pilot rolls a REA + Pilot (Combat Maneuvers) test as if it were an attack roll, including all bonuses and the option to target specific systems, and the target may resist normally with countermeasures. If the attack succeeds, the ships take turns (starting with the ramming vessel) dealing Impact Damage to each other, using (BOD ✕ ramming vessel's TR + surplus hits) as the damage value. Resist with Armor as normal–be sure to first modify the damage values if they are different Size Classes. If the Ramming Action succeeded with no surplus hits, the ram was a glancing blow and the damage stops after one such cycle. If there were surplus hits, the ships continue to alternately deal damage to each other once each per surplus hit, or until either one of them has its Structural Integrity system destroyed, whichever comes first. Both ships must deal damage against the other at least once–even if the target's Structural Integrity is destroyed on the first roll, then the receiving vessel still gets to damage the ramming vessel once.
The paragraph above assumes the vessels are in Docking Range when this maneuver is started. Different Ranges may change the amount of damage received by both vessels, the IP cost to execute the attack, and the base defense threshold (which may be altered by the target vessel using most defenses).
| Starting Range | IP Cost | ΔV Cost | Damage Multiplier | Threshold Modifier |
|---|---|---|---|---|
| Intercept | - | 50 | 10 | 5 |
| Rendezvous | 4 | 400 | 4 | 2 |
| Strafing | 2 | 50 | 4 | 3 |
| Docking | 2 | 100 | 1 | 0 |
Breach Vessel (2-4 IP): If the vessel being piloted has a Breaching Connector (or is an Injection Missile), the Pilot may attempt to Breach a vessel using the Combat Maneuvers Specialization. Treat this as a ramming attack as described above, targeting the Pressurization System and dealing a single round of damage by each vessel–surplus hits on the attack move the randomly targeted system towards the Pressurization System, and the vessel cannot be breached if another System is hit instead. Use the rating of the Breaching Connector as the Piercing Damage value, modifying the DV for Size Classes and resisting the damage with Armor as normal. If the Pressurization System is successfully damaged, the target vessel is breached, and the breacher may enter the vessel. Though the Pressurization System is damaged, the vessel does not depressurize at this time–the breaching craft will form a loose seal with its target (even if the breacher's crew is in suits), because the violence of decompression would cause the breacher to detach. Depressurization will instead happen if other damage to the Pressurization occurs, or when the breacher detaches.
Weaponized Exhaust (1-3 IP): If the vessel uses reaction-based thrust (for example, combustion and fusion-ion engines), then the exhaust can be used as a weapon. The damage dealt is Heat Damage; the Size Class is the same Size Class as the ship, and the damage value is the TR of the ship's engines. This maneuver functions differently depending on the Range at which it is begun, and always ends with the two vessels in Rendezvous Range of each other. This attack roll has a GR +3, and a glitch results in a collision. Failure of the attack generally means the target vessel has Dodged.
| Starting Range | IP Cost | ΔV Cost | Damage Multiplier | Threshold Modifier |
|---|---|---|---|---|
| Intercept | - | 500 | 3 | 4 |
| Rendezvous | 4 | 400 | 2 | 2 |
| Strafing | 3 | 200 | 2 | 2 |
| Docking | 2 | 100 | 1 | 0 |
Dock with Vessel (2 IP): The Pilot makes a REA + Pilot (Precision Spacecraft) test with a threshold of 3 to Dock with another ship or enter its docking bay. The other ship must be either willing to Dock, or be unaware of the attempt and sitting still, or be immobilized, as even the tiniest amount of movement by the other vessel will abort this maneuver. A spinning vessel is harder to Dock with, adding 2 to both the threshold and GR of Docking, unless the spinning vessel is designed to spin while being Docked with (such as a space station with simulated gravity) and has the appropriate docking ports.
Tactical Officers
The ship may have one or more Tactical Officers. All space combat weapons use the Orbital Gunnery Specialization. Tactical Officers often double as Sensor Operators (see below).
Any weapons fire Action may generate Waste Heat depending on the weapon. See the "Waste Heat" section later in this chapter for more information.
Acquire Target (2 IP): Aims the weapons at a chosen target without firing. The Tactical Officer selects a target, rolls PER + Computer (Telemetry), and banks these hits into the Aim Bank. The Aim Bank hits may be spent to target specific systems when firing on the chosen target in the same way that surplus hits on an attack test are (see the online edition).
Fire Weapon (1 IP): Fires a single battery of the chosen weapon. The Tactical Officer declares his attack (including the target, type, and number of batteries being used), and the target vessel chooses whether and how many of his countermeasures to deploy. The attacker rolls INT + Ranged (Orbital Gunnery), with the threshold as determined by the countermeasures. If successful, the attack is resolved according to the "Systems Damage" section on the online edition.
Fire Multiple Batteries (2 IP): Fires any number of batteries of any kind of weapon at a single chosen target. The Tactical Officer chooses a single weapon to act as the primary weapon (usually the most powerful); each additional weapon system being used reduces the target's base defense threshold by 1, in the same way that automatic weapons do. If successful, the attack is resolved according to the "Systems Damage" section on the online edition.
Scope/Sensor Operator
Uses the Telemetry Specialization to find targets, analyze the condition of the fight, and generally keep the crew informed. Extra Sensor Officers can make detailed observations of different targets without penalty. This station is usually in charge of communications as well.
Detailed Scan (2 IP): Scans a particular vessel in detail using PER + Computer (Telemetry). Hits may be spent to get questions about the ship answered: 1 hit to learn the status of one particular system, or 2 hits to ask most other questions.
Find Weak Points (3 IP): Scans a vessel to find a breach or vulnerability using PER + Computer (Telemetry). Bank the hits from this test, and spend them when attacking. For every three hits spent, the effective Armor rating of the target is reduced by 1 when being fired on by this vessel. This is as effective on large Size Classes as on small ones, so this is a vital element of strategy when fighting larger ships. The Sensor Operator may spend 6 IP on this Action instead, in which case every hit reduces the Armor rating by 1, instead of every three hits.
Situation Report (1 IP): This Action may be done by any officer without the off-station penalty. The officer rolls PER + Computer (Telemetry) ; provides a general overview of the encounter according to the ship's sensors, including whether a vessel is damaged (though not more detailed than a simple yes or no); whether there was any change since the last scan (e.g. whether the last attack hit or not); and what kinds of maneuvers and attacks are being performed.
Combine Sensors (1 IP): If the ship's CPU TL is at least 4, the ship can be set to share sensor readings with any number of other vessels (which must also have had this enabled). This may include automated drones with sensors, with the activation of each one requiring one of these Actions by its controller (or set in their autonomous programming). When this is enabled, all tests which can benefit from additional sensor data gain +1 to their dice pool for each ship in the sensor network. In general, any Action by the Sensor Operator or the Tactical Officer qualifies for this bonus, but the GM may rule to allow this on other tests. This bonus is capped at the (CPU TL + CPU) of the ship performing the Scan Action.
Engineering
Often the most crucial officer, the Chief Engineer is responsible for managing the systems, Waste Heat, and most importantly, repairing the ship when it hits the fan. Many Engineers would be wise to keep their radiation suits close by–any repairs to the nuclear engines or power systems (fission or fusion) will cause the Engineer to be subject to a RAD level equal to the ship's (Thrust Ratio × 2).
Repair System (2 IP): The Engineer rolls INT + Crafting with the appropriate Mechanic Specialization (usually Spacecraft Mechanic) and subtracts his hits from one chosen system's damage Bank, except for the "Crew" or "Passengers" Bank (whose damage can only be handled by medical personnel).
Replenish Countermeasures (1 IP): The Enginner rolls INT + Crafting (Countermeasures) and restores up to that many hits worth of any Countermesures, no higher than their starting value.
Transfer Heat (1 IP): The Engineer rolls INT + Science (Thermodynamics) and transfers up to twice the number of hits from the main body (Heat Bank) to Heat Sequestration, or vice versa.
Full Power to System (2 IP): The Engineer rolls INT + Crafting (System Optimization), and adds his hits to the dice pool the next time any chosen system is used, usually weapons. Any Waste Heat from firing a weapon or using an engine optimized in this way is doubled.
Extend/Retract Radiators (1 IP): No test required–the radiators are either extended or retracted. When extended, the radiators dissipate Waste Heat, but are vulnerable. When retracted, Heat will tend to build up. It's generally best to retract them as soon as incoming fire is expected.
Atmosphere as Thrust (2 IP): In an emergency situation, being able to make one more move might be more valuable than having breathable air on the ship. (It is obviously recommended that all crew don their environmental suits before attempting this Action.) This Action requires that the Pressurization System is not destroyed. By forcing open one of the ship's airlocks or docking ports, the ship's atmosphere can be expelled, propelling the vessel in the opposite direction. The Engineer chooses a Thrust Ratio and rolls INT + Science (Physics). On the Pilot's next Action, he may use this Thrust Ratio in a maneuver of his choosing with a dice pool penalty of -4 and a GR of +2. The ship's Pressurization System immediately takes (TR × 2) points of damage, resisted by the number of hits rolled by the Engineer on the Science test.
This same Action may be taken by an astronaut in a spacesuit by puncturing the suit. In this situation the astronaut acts as both Engineer and Pilot–in this case rolling REA + Science (Physics)–making both relevant tests in succession to fly around like Iron Man.
Chief Medical Officer
The Chief Medical Officer is likely to be called upon when damage is dealt to the crew.
Treat Injuries (3 IP): The CMO rolls INT + Medicine (Field Medic). For each hit rolled on this test, one point of damage from the "Crew" or "Passengers" damage Banks is removed.
Preventative Care (3 IP): When a particular medical threat is known–most notably high-G maneuvers, disease, toxins, or radiation–the doctor may take steps to prepare the crew for it, usually some sort of inoculation. He rolls INT + Medicine with a relevant Specialization, such as Aerospace Medicine, Pathology, Radiation Poisoning Treatment, or Toxicology, and adds his hits to the Preventative Care Bank. When resisting the specified threat (after applying any other damage resistance that may be rolled), each hit spent from the Bank prevents one point of damage being added to the Crew damage Bank.
Computer Technician
....because it looks better on the resumé than "Hacker". Many systems have embedded computers, and the Technician knows how to attack them. Military vessel computers are generally locked down, but can still be damaged.
Target Computers (2 IP): The Technician rolls INT + Computer (Electrical Engineering). He provides information to the Tactical Officer on how to best damage a particular system. If the Tactical Officer makes a called shot to that system and succeeds in damaging it, the hits from this test are added to the damage value of that attack.
Sensor Ghost (2 IP): The Technician exploits the sensors of the opposing craft. He rolls INT + Computer (Sensor Obfuscation), and his hits may be used in one of two ways: they can be spent as a countermeasure that behaves like Chaff, or he may try to create a particular illusion to fool the crew of the other vessel, in which case his hits become the threshold for the Telemetry test to see through the ruse. In either case, this test is subject to a dice pool modifier based on the difference between the respective (CPU TL + CPU) Attribute of each Navicomputer.
Ship Systems
Systems Table
| Slot | Main System | Secondary |
|---|---|---|
| 2 | Maneuvering Engines | Navicomputer |
| 3 | α | Passengers/Cargo |
| 4 | β | Countermeasures |
| 5 | Scopes/Sensors | Pilot/Crew |
| 6 | Life Support | Pressurization |
| 7 | Armor | Structural Integrity |
| 8 | γ | Fuel Tanks |
| 9 | δ | Power Generation |
| 10 | Landing Equipment | Primary Engines |
| 11 | ε | Heat |
| 12 | ζ | Auxiliary Power |
Each ship has a damage table containing all of its vital systems, arranged from the numbers 2-12. It contains six blank spaces–the α (Alpha), β (Beta), γ (Gamma), δ (Delta), ε (Epsilon), and ζ (Zeta) systems–which have different systems for each ship; they are provided in the description of the ship in question. These spaces are generally filled with the primary payload or special weapons systems of the ship. If any of these slots are empty in the ship description, that slot is simply blank, and damage to that system automatically passes to the secondary system in that slot.
In some cases, these spaces may contain additional copies of systems that already exist elsewhere. For example, a passenger liner might have "Passengers/Cargo" as one of its special systems, indicating that the passengers are an easier target than on some vessels. In this case, the additional copy refers to the same system, and damage received in one location is shared on both.
Systems Damage
The Systems Table of a vehicle is the vehicle's physical damage Banks. Heat Damage can be thought of as analogous in some ways to Stun Damage to life forms.
When an attack against the ship is successful, first reduce the attack's DV by the Armor value, then roll the ship's BOD and reduce the DV further by the number of hits. (If the attack's DV contains multiple types of damage, this is repeated for each type.) If any damage gets through its Armor, the Captain rolls 2d6. Add the numbers on the dice and consult this table to determine which system is to be hit. If the attacker has targeted a system, the surplus hits on the attack roll may be used to "move" the result of this dice roll towards this system, one value per hit (see "Targeting a System," below). After being resisted by Armor as normal, the damage is added to the leftmost system on the table at that slot if both systems are undamaged. If the first system has any damage or is destroyed, the attacker may choose between either system.
If any system receives more damage in total than the vessel's (BOD × 2), that system is completely destroyed and cannot be repaired; it can only be overhauled in drydock. Overhauling or replacing a system generally costs 5-30% of the total cost of the vessel (depending on the intricacy of the system). Structural Integrity cannot be overhauled, and the ship is considered a total loss if Structural Integrity is destroyed; in fact, the ship will generally break apart in this scenario.
Targeting a System
The attacker may attempt to target a particular system. When declaring the attack, the attacker may also choose to target a specific system slot (from 2 to 12). They roll the attack as normal, and if the attack is successful, roll 2d6 as normal. In this case, however, the surplus hits the attacker rolled are used to "move" the 2d6 result towards the desired slot, one at a time; when targeting a system, surplus hits do not add any damage to the weapon's DV. If there are not enough hits to reach the targeted system, then the attack ends up hitting the last system it reaches before hits run out.
When targeting a system, an attacker who is familiar with the Class of the target ship may roll to gain additional "moves" if the attack hits. The character may roll INT + Science (Spacecraft Design), or INT + Relevant Interest (such as "Bactaran Ships"), and count the hits on this test to move the target. If the attacker had access to its blueprints, has spent extensive time in one in his character's history, or has advice from someone who has, this test may receive additional dice at the GM's discretion.
Just as with a standard attack, only the first (leftmost) system in the slot may be targeted unless it has already received damage, in which case either system may be targeted.
Overflow Damage
If there is enough damage to destroy a system with damage points to spare, the surplus overflows to a new, randomly chosen system. Roll 2d6 to determine the system, and the damage always overflows to the leftmost system unless it is destroyed. If this next system is destroyed in turn, this damage can cascade to as many systems as the damage value allows. This is frequently the case when a larger ship hits a smaller one, and can easily result in one-shot kills.
Effects of Being Disabled/Destroyed
Armor : On future attacks, the vessel may not use Armor to reduce the damage received.
Auxiliary Power : If primary power generation is also disabled, disabling this system takes out communications and life support as well as any other systems the GM deems appropriate. In addition, all engineering tests will be at a -3 dice pool modifier, due to vital equipment shutdowns.
Communications : The vessel cannot communicate, nor broadcast/receive IFF beacons. If an ally vessel glitches on its attack roll, a friendly fire incident may occur targeting this vessel, and vice versa.
Countermeasures : The vessel can no longer deploy any of its countermeasures, except for shields (which are a separate system).
Crew/Passengers : When this system is hit, some number of crew members have been hurt or killed. The Crew "system" does not have a particular maximum value; rather, every point of damage to the Crew implies that each crew member has taken, on average, one point of damage. Damage to this system does not disable the crew outright, but for every point of damage, all Actions by the crew take a -1 dice pool modifier due to injuries on the staff or to the characters themselves. This system cannot be repaired by the Engineer, only the Chief Medical Officer; note that the CMO themself is subject to the dice pool modifier from damage to the Crew. Generally, the crew is considered to be dead if the penalty reduces the CMO's dice pool to zero; short of this level, the difference between crew deaths and crew injuries is left to the GM to describe.
Docking Ports/Bays : The vessel cannot Dock or take on smaller craft. Additionally, craft that are Docked or in the bay may be damaged, destroyed, or set adrift.
Engines (Primary, Secondary): If one kind of engine is disabled, the vessel's TR and ΔV are reduced to only the remaining system. If all engines are disabled, this vessel cannot accelerate at all, which generally means none of the Pilot Actions are available.
Fuel Tanks : The fuel tanks are ruptured, and leaking fuel. At the beginning of each combat round, 1% of the ship's ΔV leaks for every point of damage this system has taken. If this system is completely destroyed with any fuel left in it, it results in a catastrophic explosion that could destroy the ship (at GM's discretion).
Heat Sequestration : The vessel cannot Sequester Heat. Any Heat currently Sequestered is immediately released into the ship's main body, dealing damage to a random system.
Landing Equipment : This vessel cannot land; crashing (or as it's sometimes called, lithobraking) is the only option for getting better acquainted with solid ground. Crashlanding will deal massive damage to the ship and crew at the GM's discretion, but will almost always destroy the Structural Integrity system.
Life Support : The crew is "breathing shallow" from this moment on. There is no immediate effect, but each time Initiative is rolled, 1 point of damage is dealt to the Crew system.
Navicomputer : The ship's navicomputer can no longer assist on Astronautics or Pilot tests, placing these tests at a -CPU TL penalty.
Payload : If the ship is carrying passengers, they may be killed. If it is carrying cargo, the cargo may be lost to space or destroyed. If there is some other payload relating to the mission, say scientific instruments, that may be damaged.
Power Generation : The ship is reduced to auxiliary power. Weapons, Shields, Scopes/Sensors, and any engines reliant on power (including ion and fusion-ion engines) are disabled. All hits on repair tests to the Power Generation system repair two points of damage. If power generation is nuclear in nature, a damaged reactor will flood the ship with radiation–as a rule of thumb, the RAD environment of the reactor area (where the engineering crew will need to be to repair it) will increase by the max TR of the vessel (or more if the ship has significant power usage aside from the engines); the remainder of the ship (i.e. the Crew system) will receive half that each time Initiative is rolled until the damage is repaired.
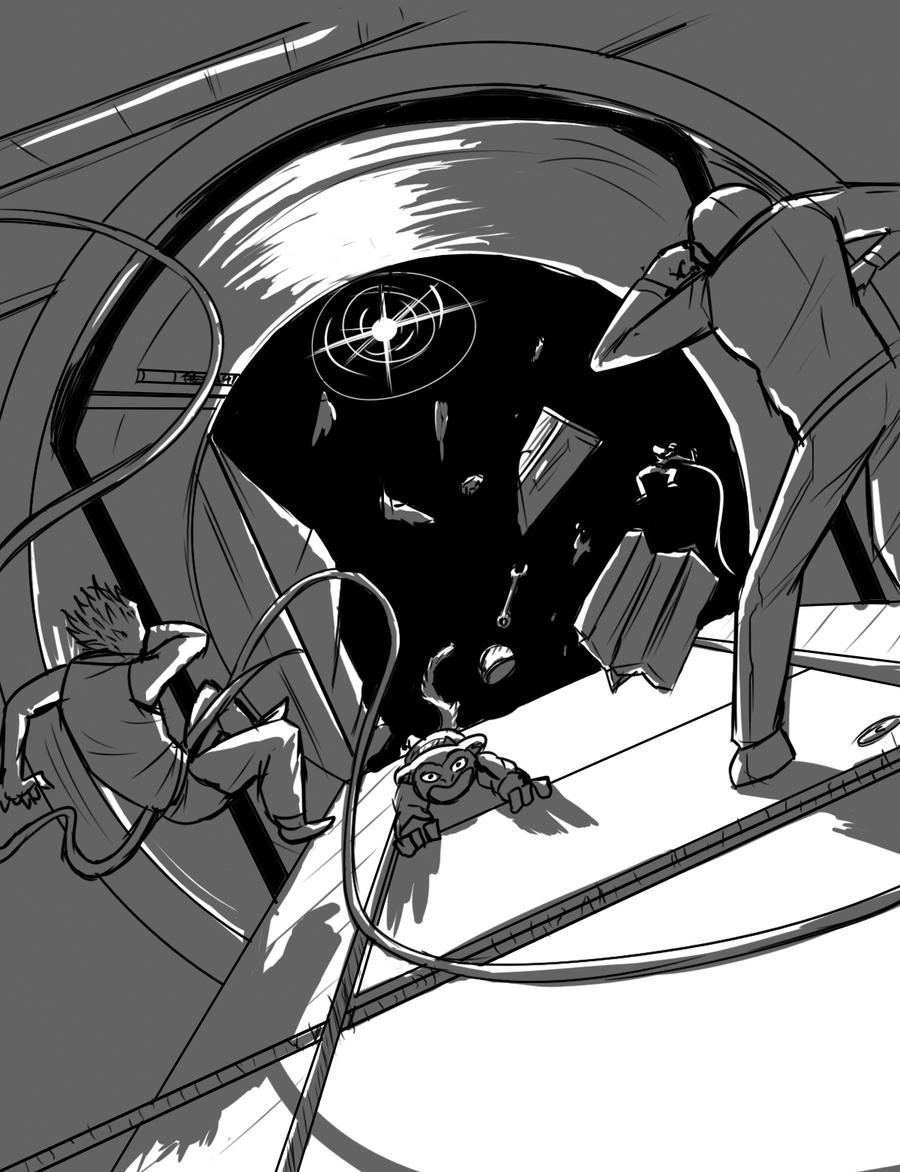
Pressurization : When disabled, a hull breach vents part of the ship's atmosphere into space. Ships may be double-hulled, compartmentalized, or neither. If neither, any damage to this system indicates the entire vessel is depressurized, and any crew that cannot survive in vacuum are rendered unconscious (and dead shortly thereafter). If the ship is compartmentalized, this harm is mitigated and contained; certain systems (chosen at random) are no longer accessible/usable without a pressure suit, and some crew are likely to be in the depressurized areas. Nearly all Class D and E ships are compartmentalized. If the ship is double-hulled, the inner hull is not punctured until this system is destroyed. Until then, damage to this system acts as a negative dice pool modifier to make repairs to the ship (many avionics and piping systems are run through the space between the inner and outer hull, which will be depressurized after the damage is received). When the system is destroyed, pressurization on the entire ship is lost, no matter the configuration. See the "Piercing Damage and Pressure Vessels" section below for more information.
Scopes/Sensors : The electronic systems of the ship are blinded. Any Action requiring them (including weapons targeting) is at a -6 dice pool modifier.
Shields : The vessel's shields no longer function.
Structural Integrity : When disabled, the ship no longer resists damage with a BOD roll, and cannot engage its engines without dealing the ship more damage (in the amount of its own TR, unresisted). When destroyed, the ship breaks apart entirely; pressurization is lost and the ship is generally considered a total loss. It may be possible for an Engineer to Juryrig certain systems on the ship fragments to function again, however.
Weapons (various types): The specified weapons systems are disabled and cannot be fired or aimed.
Repairing Systems
The engineering staff may repair systems with a Repair System Action (using 2 IP). (Remember, they work as the Size Class of the vessel they are repairing.) The Engineer rolls their INT + Crafting (Spacecraft Mechanic). For every hit they get on this test, the damage value of the system being repaired is reduced by 1. The system is restored to normal operation when the damage is reduced to zero.
The Engineer can use the Juryrigging Specialization to make a system function again, but at high risk. When Juryrigging is used, the system is immediately affected by a GR in the amount of the current damage value. The Engineer then rolls a repair check as normal, but each hit on this check restores 3 points of damage. A glitch test (with the GR value as determined above) is rolled anytime this system is used. In the case of passive systems that do not have a dice roll (such as life support), the GM should roll a Glitch Check each time Initiative is rolled instead. In the case of a glitch, the system is destroyed. This GR value can only be restored by overhauling the system in drydock, just as with destroyed systems.
Piercing Damage and Pressure Vessels
A pressure vessel–or anything hermetically sealed–can have its hull breached if it takes any Piercing Damage at all beyond its ability to resist the damage. This applies to spacecraft as well as to spacesuits, diving suits, and so on. While the vessel's Pressurization System may be targeted if depressurization is the intention, refer to the following rules for all Piercing Damage, regardless of which system is targeted or hit.
Sudden Decompression
When a vessel is breached and experiences decompression, its occupants will start having a bad day. The air in the vessel will rush at extreme speed through the breach. This wind vortex sweeps up objects and people alike, and will deal Impact Damage. If a character is attached to a surface with mag boots or strapped to a chair, this damage will come from either swept up debris striking them or the effect of the sudden decompression itself. If the character is standing or floating, they will be swept up and the damage comes from impacting whatever it is they hit. This Impact Damage is resisted normally.
The base damage value is the amount of Piercing Damage that got through the vessel's damage resistance (which determined the size of the breach), plus the ATM pressure at which the ship was kept (usually assumed to be the crew's minimum ATM tolerance). This base damage is treated as Size Class B and gets multiplied by the Damage Multiplier from the table below, and for larger vessels, may be dealt multiple times as the torrent of air continues to stream past. The first damage is dealt immediately, and any further turns' worth of damage will be dealt as Initiative is rolled. The turn counts are based on a Class B Time Scale for the combat, so if the combat is being run at a larger Time Scale, the subsequent damage may happen multiple times simultaneously.
| Vessel Size Class | Damage Multiplier | Duration |
|---|---|---|
| B | 2 | 1 turn |
| C | 2 | 2 turns |
| D | 1 | 4 turns |
| E | 0.5 | 8 turns |
Heat
Most systems generate some sort of Waste Heat simply by operating. In space, without an atmosphere, even small amounts of Heat, if not discharged properly, can build up and cause serious problems. The ship as a whole has a Heat Bank that begins at 0 and builds up or dissipates over time. This Bank acts as a negative dice pool modifier for any Stealth Check attempted with this craft.
The Heat Bank maxes out at the vessel's (BOD × 2). When full, Heat overflows, and is applied to a randomly chosen system as systems damage. This damage bypasses Armor, and is applied as Heat Damage is received. Since Heat Damage is often received in many small doses (especially Waste Heat), this will tend to damage many systems with small amounts of damage.
Waste Heat
Many systems, when activated, will create Waste Heat on one's own vessels. This Waste Heat is added directly to the damage Bank.
-
Lasers generate 2 points for each laser battery fired.
-
Coilguns generate 1 point for every battery fired.
-
Plasma guns generate 3 points for each blast.
-
Chemical engines generate 1 point for every 2 TR points they put out for a turn.
-
Fusion ion engines generate 1 point for each 1 TR points they put out for a turn.
Dealing with Heat
There are three main ways to deal with Waste Heat in a vacuum: Sequestration, Radiation, and Ablation. Additionally, when not in vacuum, a ship can take advantage of Convection. When heat damage is received, it first goes to the vessel's Heat Bank. The Heat Bank can absorb a certain number of points of Heat before it can no longer take any more, and the rest of the ship begins to take damage from the heat.
Sequestration
Sequestration is a temporary solution, meant for dealing with large, short-term energy discharges (that is, battle), and the ship can slowly get rid of the rest of this Heat later. The ship's Engineer can take a Transfer Heat action to move points between the Heat Bank and the Heat Sequestration Bank.
Surface Radiation
Surface Radiation (not to be confused with the dangerous ionizing radiation, which is what Radiation Damage refers to) involves the natural emission of Heat from the surface of the object into the vacuum of space as infrared emissions. Each vessel has a Surface Area rating (usually 1). This rating is passively removed from the vessel's Heat Bank every time Initiative is rolled.
Radiator fins are a part of many vessels. These fins are retractible for safety, and are best used after battles and while performing an engine burn. While extended, every time Initiative is rolled, the fins remove their rating from the Heat Bank. The downside is, while extended, the threshold for targeting the vessel is reduced by that same score.
If hit while extended, the radiators are what gets hit first, and they, by their nature, have no Armor. Before the weapon damages the vessel itself, every point of damage reduces the points available to the Radiator system (while reducing the effective DV of the incoming attack). As this happens, the points are immediately re-added to the defense threshold; if this causes the attack to miss, then no further damage is calculated. If, without changes to the defense threshold, the attack still hits, then any remaining points of damage hit the main body of the vessel and are treated normally.
Radiators can be extended or retracted by the Engineer with a Simple Action. Radiators should not be extended during atmospheric flight or reentry; if they are, they will be destroyed.
Ablation
Ablation is the act of removing the hottest matter from the ship, thereby lowering the average temperature of the ship. This often takes the form of an Ablative Armor or Heat Shield that burns off, but can take other forms–a centrifuge of fluid that boils off until it is released into space, for example. Ablation removes Heat much faster than Radiation, but has a finite amount of usage since you must remove mass from your ship to accomplish it.
Ablation is an automatic process. Once above a set threshold (usually just before Heat Damage begins to overflow), Heat is removed the next time Initiative is rolled and the Ablation material is gone with it. Each point of Ablation can clear the entire Heat Bank The ship's Engineer can change the ablation threshold with a Complex Action (2 IP).
Convection
If flying through atmo, Convection has the potential to sap away huge amounts of Heat–every time Initiative is rolled, it removes half the difference between the vessel's Heat Bank and the planet's TMP rating, rounded down and capped at the ATM Attribute of the world.
During reentry, on the other hand, the compression of the air heats up the craft faster than convection saps the Heat away. If the body being entered has an atmosphere, reentry adds the body's (GRV + ATM) rating to the vessel's Heat. This only really matters if the Heat cannot be Sequestered or Ablated and overflows into physical damage, because immediately following the reentry damage, the vessel will be cooled by atmospheric convection. The remainder of the trip through the atmosphere reduces the Heat back down by (ATM), to a minimum of the planet's (TMP).
Ranges
Two ships may be at one of several specific Ranges relative to each other. They are listed here mostly in order from longest to nearest. A vessel that moves to a closer Range towards a target vessel will also move towards any other craft that is in a closer Range with that target.
Deep Range
If two craft are orbiting different parent bodies, they are at Deep Range. Very few things can interact in any meaningful way at Deep Range. The differences between velocities and the extreme distances involved make most Actions impossible. Only passive sensors can function.
Orbital Range
If two vessels are in orbit around the same body (which includes the Lagrange points involving that body, but does not include orbits around the moons of that body), they are in Orbital Range. The differences in velocity are still great, but the shorter distance means active sensors and lightspeed-based weapons can function, though both should have their thresholds for success increased by at least 4.
Co-Orbital Range
Two craft are Co-Orbital if they are at the same orbital node, but are at different phase angles along that orbit. If one ship moves to the same node as another ship, but does not specifically intend to go to Rendezvous Range, this state is assumed (except for transfers to Lagrange nodes, which proceed directly to Rendezvous Range by default). Changing phase angles (to move from Co-Orbital Range to Rendezvous Range) requires the same Astronautics test and ΔV expenditure as any one path leading away from the node (navigator's choice), and takes one quarter of the time of the orbital period. All other Attributes of this Range are the same as Orbital Range.
Rendezvous Range
Called "Combat Range" in appropriate situations, Rendezvous Range indicates two ships are in the same orbit, as well as near to each other and with a comparatively small relative velocity. Crucially, the parent body's gravity will generally affect both ships in Rendezvous Range by the same vector, so movement is largely a matter of straightforward, three-dimensional space, and not manipulating orbits. Nearly all weapons and sensors function in Rendezvous Range.
Intercept
Two ships passing in the night. An intercept occurs when two vessels are within the Rendezvous Range in distance, but have high relative velocities; the proximity is fleeting and momentary. All Rendezvous Range sensors and weapons may be used, but only for an instant (meaning one Action per character, with no Blitzing), and with a threshold modifier of +2. Intercepts might be intentional (in order to attack or scan without giving the target a chance to counterattack, for example), but they often occur when a Pilot test attempting to enter Rendezvous Range is failed. After an Intercept, the two vessels will be in Co-Orbital Range.
Docking Range
Two vessels are at a relative stop, and very close to each other. Vessels in Docking Range may Dock, naturally. If weapons are fired from one vessel at another at Docking Range, the attack roll gets a +6 modifier, and, if successful, the targeted system is automatically hit. Many weapons, especially explosives, will splash damage from one vessel to another within Docking Range when they go off.
Strafing
Much like an Intercept, a Strafing maneuver is like a momentary Docking Range, without matching velocities. Strafing may occur after Docking Range is broken, or it may be the intentional result of a Change Range maneuver. Any attacks conducted while Strafing gain a +3 modifier, and, if successful, an automatic 2 additional hits are granted towards targeting the chosen system.
Countermeasures
Some vehicles have defenses against incoming weapons fire–anti-missile lasers, interceptor missiles, and so on. If such countermeasures are applicable against a particular weapon targeted at the vehicle, they may be spent each combat turn as if they were IP to add to the defense threshold. The number in parentheses by the countermeasure is multiplied by the number of points added to the defense threshold for each point spent. One point of any one Countermeasure replenishes any time Initiative is rolled, and the Engineer may replenish additional Countermeasures with the Replenish Countermeasures action (see Guns and Ships). Each form of countermeasure has its own rules for usage (when it can be used, what kind of resources it uses and when, etc) that should be referred to.
Chaff (threshold 2)
Chaff can be deployed to confuse sensors. Chaff works against all weapons that are targeted with sensors.
Evasive Maneuvers (threshold TR)
A vessel may attempt to move, making it harder to target. This countermeasure is available to all vessels whose engines are TR 1 or higher and whose Size Class is D or lower. In order to use this, the Pilot must have hits in the Defensive Maneuvers Bank (see the online edition).
Interceptor Guns (threshold 3)
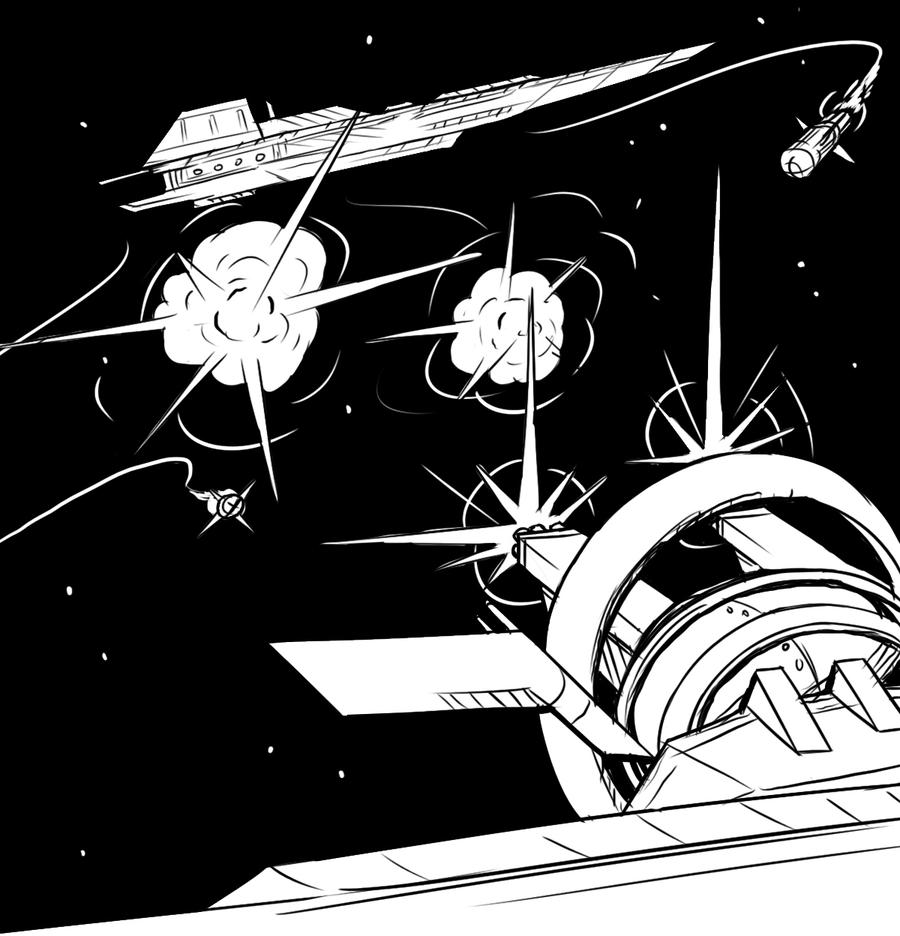
This phalanx of extremely rapid-fire guns is designed to shoot down incoming missiles. The Interceptor Guns system may be used as a Coilgun that is considered to be two Size Classes below that of the vessel. Interceptor Guns can be used twice for weapons being fired from outside Rendezvous Range.
Interceptor Lasers (Threshold 3)
These small, accurate lasers are designed to shoot down incoming projectiles, including missiles and ballistic weapons such as coilguns. If the defense is successful, the projectile is destroyed mid-flight. Like Interceptor Guns, Interceptor Lasers can be used as offensive Thermal Lasers, in this case one Size Class lower than the Size Class of the vessel.
Dissipation Cloud (Armor 3)
A Dissipation Cloud puts out small particles–dust, gas, sand, or even trash–to dissipate the energy from an incoming laser weapon. Unlike other countermeasures, the Dissipation Cloud does not add to the defense threshold, but rather, reduces the DV of the incoming laser if it does hit (effectively adding its points to Armor).
Magnetics (Threshold 2)
A powerful magnetic field distorts the path of any metallic projectiles, particularly coilgun ammunition and missiles, such that it misses the target.
Shields (Threshold 4)
An advanced technology, Shields channel energy directly into projectiles to cause them to explode or vaporize just outside Docking Range. In addition, the field they generate can cause energy weapons including lasers and fusion weapons to dissipate and scatter, reducing their damage. In addition to the standard defense threshold when used as a countermeasure, Shields passively provide 2 points of Armor against Splash Damage as long as they have any points left for the round, or an additional 4 points of Armor (for a total of 6) for each point spent if actively utilized to do so; this must be declared prior to the detonation of the weapon causing Splash Damage. Shields may work against all incoming weapons.
Land, Air, and Sea Vehicles
While space combat is the obvious focus of Afterverse in this chapter, many of the rules written here apply to non-space vehicles as well.
Vehicles not meant to travel in space tend to be less delicate, since there is less concern about carrying extra mass. By the same token, ground and air vehicles tend to carry as much fuel as they need to, so fuel capacities are not listed.