
Objects in Space
Space travel is a major aspect of Afterverse in most eras. Traveling through the universe is a normal part of life after first contact, and conflicts are likely to arise during space travel.
Basics of Space Travel
"What goes up must come down," is true for most things, and the only way to bypass that truth is speed—orbiting a celestial body is the art of falling towards the ground and missing. Thus, the most fundamental aspect of space travel in Afterverse is that it is more about speed than location. As such, the amount of fuel any given craft has is not listed in mass, volume, or distance, but in acceleration—the change in velocity, or delta-V (ΔV). Delta-V is a good, relatively predictable measure of where exactly your vessel is capable of going, and how fast. Different engines may have wildly different amounts of ΔV available for the same amount of fuel mass.
Delta-V and Fuel
The ΔV available to a particular vessel does not represent a specific amount of fuel so much as a specific amount of acceleration. It is listed this way due to the rocket equation: fuel must push all the remaining fuel as well as the craft itself. The first liter of fuel must accelerate the ship plus the other 99 liters of fuel, while the last liter of fuel needs to only push the ship, and as a result, the last liter is "worth" more ΔV than the first. In Afterverse, the exact volume of fuel in the craft is ignored in favor of a simple, flat ΔV value.
A note on realism: For convenience and clarity, this book treats ΔV as a unit in the text. However, ΔV is more properly a concept, and the units being used are meters per second. The book might say you've used "4,000 ΔV", while it would be more correct to say you have used "4,000 meters per second worth of delta-V."
Craft that share the same type of engine may share fuel. Most commonly, this takes the form of a mothership refueling its smaller attachés. When refueling, the Mass Ratio of the two ships is used as a multiplier; every 1 ΔV from the larger ship is worth (ratio) ΔV from the smaller one. It is up to your gaming group how strictly to track and adhere to fuel consumption. Generally, fuel is only explicitly tracked on vessels that are controlled by the players, and only loosely tracked for other vessels. In other words, if your party refuels their small transport from a mothership, the transport's tank is simply full, and the effect of the refueling on the mothership is ignored; the GM simply declares at some point that it is time for the mothership to refuel. On the other hand, if the party is in control of the mothership and fueling many transports, it may be worthwhile to calculate the fuel being used to refill those tanks.
Mass Ratio
The Mass Ratio is an approximation of the ratio of the mass of a larger ship to that of a smaller ship. This is useful for refueling and pushing/towing calculations. It is determined by the difference between the BOD ratings of the two craft within the same Size Class. If the two objects are 1 Size Class apart, the Mass Ratio is multiplied by 100; 2 size classes apart, 10,000; and so on.
| Difference | Mass Ratio |
|---|---|
| 0-1 | 1 |
| 2-3 | 2 |
| 4-5 | 5 |
| 6+ | 10 |
So, for example, the mass ratio between a C4 and a C8 vessel, a difference of 4 BOD, will be a ratio of 5. Comparing a C4 and a D4 vessel, the ratio will be 100. Comparing a C4 and a D10 vessel, the ratio will be (100 × 10), or 100 for the class difference times 10 for the numerical difference—the D10 vessel is 1,000 times as massive as the C4 vessel. If the numerical difference opposes the class difference—a higher letter coupled with a lower number, or vice versa—divide the numbers instead. A D6 vessel compared to a C10 vessel will have a mass ratio of (100 / 5), or 20.
Advance Crews
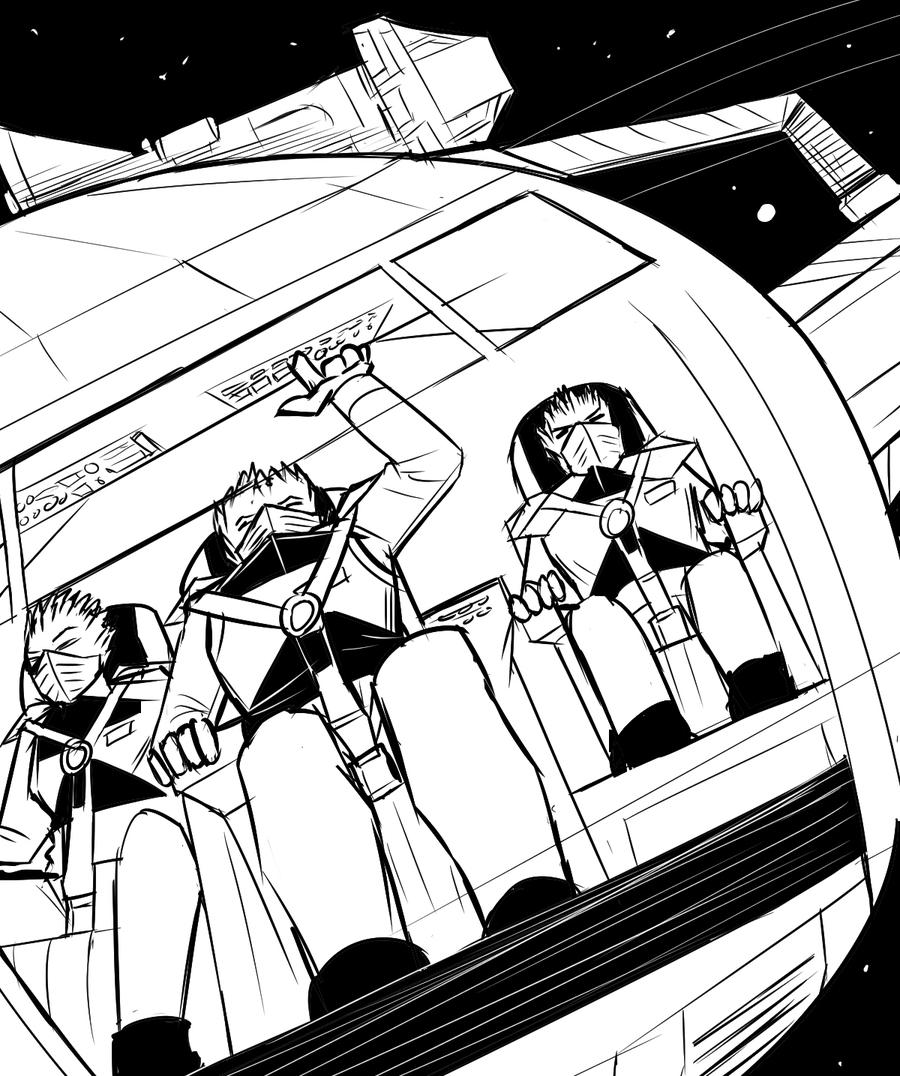
A larger ship may refuel a small ship at minimal cost to itself. As a result of this fact, it is a common practice, when time is of the essence, for the mothership to dispatch smaller ships at high speed towards the target. The advance crew's ship can Hard Burn freely, using up almost all of their fuel, and reach the destination very quickly; the mothership can take its time, saving fuel (which amounts to considerably larger savings for it than the smaller vessels). The advance ships are expected to reach the destination in time to fulfill the mission, and then await pickup by the mothership, which will refuel them.
This strategy is common, and known as sending an advance crew. From a storytelling perspective, if your player characters are part of the crew of a ship, this strategy is a good way to get the party to act as a unit of heroes at the center of the action for the duration of a mission, rather than acting as a small, forgotten part of the large starship crew, or as a detached command crew who simply orders soldiers into the fight.
Space Travel Using the Transit Map
Each system in Afterverse has a Transit Map which lays out the manner in which a vessel would move from one orbit to another in that system, and outlines the fuel costs and difficulties for these maneuvers. This map will contain a number of stable "nodes"—usually representing either an orbit or a landing—connected by "paths," and the ΔV amounts needed to move across a given path from one node to another. Changing orbits is a matter of moving from one node to the next. Simply add up the total of ΔV listed each step along the way, and the result is the total ΔV which will need to be spent on that journey (before modifiers from net hits, skipping nodes, aerobraking, or hard burns).
Every attempt to move from one node to another is called a maneuver. When executing a maneuver, a player first announces his intended destination node and the desired Hard Burn multiplier. The fuel usage is calculated as described below. He (or the ship's astrogator) rolls an INT + Science (Astronautics) test to calculate the maneuver, with a threshold equal to threshold provided on the map. Finally, he executes the maneuver he has just planned, using a REA + Pilot (Deep Space Maneuvering) (with a threshold matching the Astronautics threshold for that path), or if indicated on the transit map, a REA + Pilot (Precision Spacecraft) test instead.
Skipping Nodes & Efficiency
The player may choose how many nodes to travel in one maneuver. If skipping over one or more nodes in one maneuver, the thresholds for all paths are added together to determine the threshold for the Astronautics test, making node-skipping maneuvers more challenging. The player may decide to make a number of smaller tests rather than one large one, which makes the tests easier, but reduces opportunities to save fuel. The ΔV cost of the entire node path of the maneuver is summed up; the hard burn multiplier is applied; finally, fuel usage is reduced according to the table below.
| Nodes skipped | Fuel savings |
|---|---|
| 0 | 0% |
| 1 | 5% |
| 2 | 10% |
| 3 | 20% |
| 4 | 30% |
| 5+ | 40% |
The first step to any maneuver is an INT + Science (Astronautics) test to calculate the route, with the threshold determined as described above. Next, when executing the route that has been calculated, the pilot should make one or two tests. The first is a REA + Pilot (Deep Space Maneuvering) test, with the threshold as the highest single Astronautics threshold along the maneuver's paths. If any path in the maneuver has a Precision Space Craft threshold (generally takeoff and landing), the pilot should also roll a REA + Pilot (Precision Spacecraft) test with that threshold. No single maneuver may contain more than one path with a Precision Spacecraft test.
Inexperienced pilots generally take the safer and easier route, moving one node at a time, resulting in very simple, by-the-book maneuvers that are nigh impossible to mess up. However, by plotting a more complex path, experienced pilots can take advantage of tricks like gravity assists, slingshot maneuvers, and the Oberth effect to reduce ΔV expenditures.
Intermediate Orbits
It is possible to improvise new nodes along the "path" between two other orbital nodes. These take two forms: Intermediate Orbits, and Irregular Orbits. Neither of these kinds of improvised nodes may be used in combination with the "node skipping" rules above.
An intermediate orbit is simply an orbit at a height in between two other orbits, most commonly between Low Orbit and Synchronous Orbit. For example, around Earth, GPS satellites orbit in Medium Earth Orbit, between Low Orbit and Synchronous Orbit. Intermediate orbits are most useful in avoiding Kessler Crowding of particular orbits, or to simply place something in an unusual location to make it harder to reach. Some specific scientific or technological purposes find benefit in specific orbits.
To create the node for an intermediate orbit, simply divide the ΔV cost of the path into two parts (roughly proportional to how close the new orbit is to each orbit) and apply the two values each to a new path to the new orbital node; the threshold for both new paths is the same as the original path.
Irregular Orbits
An irregular orbit is an unstable, usually highly elliptical orbit. A vessel moving from one node to another has created an irregular orbit between those two nodes; this is ignored in most scenarios, but occasionally it is useful. Almost all maneuvers involve (at minimum) a burn at the beginning and a burn at the end of the maneuver, and in between these two burns, the vessel is on an irregular orbit.
If trying to match orbits with a vessel on an irregular orbit, the pursuing vessel must use half the ΔV of the entire maneuver which created the irregular orbit in the first place, tasked with the same threshold. If the pursuing vessel is trying to catch up to a target, they will have to burn harder, spending more fuel, in order to reach the target before the target reaches its target node. If the pursuer catches the target en route, the target will have only actually spent half of the ΔV of the maneuver, and the remaining half is available during the encounter for actions like dodging.
Aerobraking & Aerocapture
When approaching a planetary system that includes a world with an atmosphere, any vessel that is capable of atmospheric travel may take advantage of aerobraking. This practice involves barely dipping into the atmosphere, using partial reentry to bleed off speed and reduce your overall orbital height. When doing so, the ΔV cost of any paths in the planetary system is reduced by as much as 50%, which is added to any fuel savings from combining nodes—the final fuel savings may be as high as 90%. The actual amount saved by aerobraking is determined by the number of nodes away from the planet the destination orbital node is, with 0 being the landing node itself.
| Nodes | Fuel savings |
|---|---|
| 0 | 50% |
| 1 | 20% |
| 2 | 15% |
| 3 | 10% |
| 4+ | 5% |
Aerobraking causes the vessel to take (Nodes skipped + G + Planet's ATM) Heat damage (based on the planet's attributes) which is resisted normally. For most worlds the damage is not significant unless the vessel has already taken damage. However, it does make gas giants dangerous for aerobraking.
Transferring from a Low Orbit node to the Landing Node of a body with an atmosphere has a flat cost of 200 ΔV. In this case, the listed ΔV value on the transit node only applies to launching.
A glitch or failure of a maneuver involving aerobraking means that the vessel has dipped too far into the atmosphere—the pilot must make an immediate landing test (REA + Pilot (Precision Spacecraft), with the same threshold given on the Landing Node on the transit map) to avoid crashing, and the vessel ends up at the Landing Node of the planet (generally in a random place on the planet's surface). If aerobraking in a gas giant's atmosphere, a successful recovery test (which functions the same way as the landing test) results instead in an unstable Low Orbit. The vessel must boost its orbit to any higher orbit within a few minutes, or it will fall back into the gas giant, incurring further Heat damage and requiring another recovery test.
Suborbital Hops
Sometimes, you may wish to move from one point to another on the surface of the same body. This is usually done on bodies with no atmosphere, but may apply to one with an atmosphere if the craft lifts high enough to leave the atmosphere. For terms of game mechanics, a suborbital hop uses the same ΔV and Precision Space Craft values of the launch-to-low-orbit path of that world.
Thrust Ratio & Gravity
The engines on a ship have a Thrust Ratio (or TR) attribute, representing the acceleration force they are capable of. In order to land on a given celestial body, the TR of a craft must be higher than the GRV rating of that body, unless using parachutes to land on a world with atmosphere.
While the engines are thrusting, all occupants of the craft will experience (TR) points of gravity, as if they were on a planet with that GRV attribute. On ships with efficient engines and large amounts of ΔV available, constant thrust might be used to simulate gravity and keep the occupants comfortable (in addition to getting to the destination quickly).
In some cases, an engine might be powerful enough to thrust and actually hurt or kill the crew through G-forces, which is handled as environmental damage. In general, the characters will receive this environmental damage once per every 1000 ΔV spent on the maneuver (rounded up). The pilot of a ship should always be aware of the GRV tolerances of the occupants of his vessel; he may throttle down the engine to a lower amount to keep them safe, or throttle up to maximum for brief periods in emergency situations (such as evasive maneuvers). A pilot may even use this offensively as a defense against intruders, if the intruders have a lower GRV tolerance than the crew. Crash couches and flight suits may provide extra tolerance, and (if the tech is available) are standard gear for crews who may be required to operate at high thrust. Highly advanced propulsion such as Gravity Drives may negate the damaging effect.
Kessler Crowding & Debris
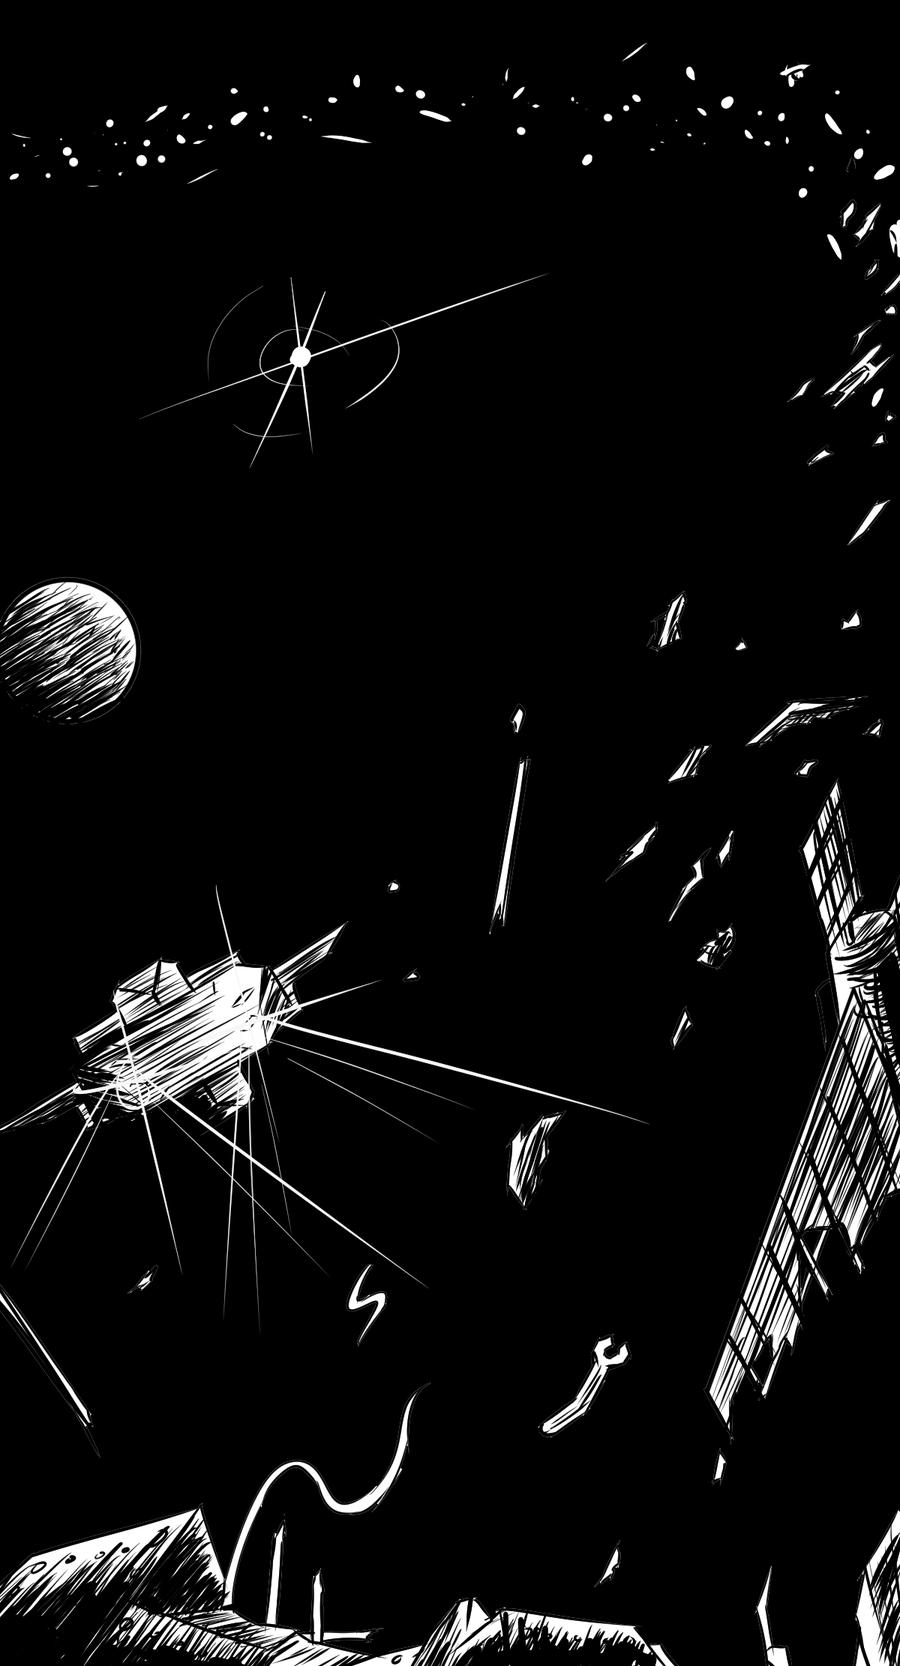
Certain orbital nodes—for example, the low orbit of Earth, and orbits within the rings of Saturn—have a large amount of orbital debris and clutter, making transit in these areas dangerous. If the node is indicated to have Kessler Crowding on the transit map, this number is added to the Glitch Risk of any Pilot Test with its starting or ending point in that orbit, and a Glitch Test is rolled. In addition, once per orbit, the GM again rolls the same glitch test.
In the event that a glitch is rolled, the vessel has been struck by orbital debris (possibly more than one piece; each 1 beyond the first one rolled in the glitch test represents a piece of debris). For each such piece of debris, roll two dice—the first to determine the Size Class of the debris (where 1 becomes A and 6 becomes F), and the second to determine the amount of damage of that Size Class that will be dealt to a random system of the vessel in Impact damage. (For example, if a 4 and a 3 are rolled, debris deals the vessel (at Size Class D) 3I damage) If the debris is the same or larger Size Class as the vessel, and the ship's scopes and engines are functioning, the pilot may make an immediate REA + Pilot (Precision Space Craft) test with a threshold of the Damage Value in order to attempt to dodge it. Smaller debris must simply be absorbed by the vessel's armor, under the assumption that attempting to dodge it would simply put the vessel in the path of other small debris.
Pirates often set up their bases within such crowded orbits, knowing that the danger will keep out tourists and the law. They will drill into moonlets (that is, class E or F rocks within the debris field) to shield their base from ongoing damage, preventing them from having to make such tests on a regular basis. They must still do so entering and leaving the node, however. Skilled pilots are in high demand for pirate organizations.
Debris in a particular spot in orbit—say, from a destroyed ship—can cause the same problem. Anytime a system of a vessel is damaged, the effective Kessler Crowding value for any vessel in Rendezvous Range is increased by 1, and such a test will be rolled at the end of each combat turn until the debris field is left behind. Any acceleration (most movement actions) will cause the vessels to leave this debris field behind after one combat turn, resetting the Kessler Crowding value to zero. Returning to the same orbit as the damaged vessel (to salvage parts from a damaged ship, for instance) will place the vessel in the same debris field. In this case, the Size Class of the debris will be limited to one Size Class lower than the vessel that caused the debris (if the first die rolls a higher Size Class, it should be rerolled).
Types of Orbits on the Transit Map
Each node on the transit map represents one of the following orbits or situations. In general, they represent a set of places or an orbit and not a particular place—for example, a Landing Node may represent any point on the surface.
Landing Node: This node represents landing (or launching from) at the equator of a planet; the GM may add up to 40% to the ΔV cost if landing or taking off from a spot closer to the poles (though generally only if coming in from the Low Orbit node; higher approaches should be able to freely target anywhere on the surface with no penalty.) The landing maneuver always requires a REA + Pilot (Precision Spacecraft) Test; for takeoff, the listed threshold is halved (round up).
Warp Bridge Node: Traveling to this node implies traversing the warp bridge by "falling" into the singularity (with the proper Junardm equipment, of course). Traversing to this node always requires a REA + Pilot (Deep Space Maneuvering) test with a threshold of 5; no test is required upon exiting the wormhole.
Low Orbit Node: This node represents the lowest stable orbit a craft can get into around a celestial body. Most traffic from the surface will go here first.
Synchronous Orbit Node: Orbiting at this node will keep the vessel above the same point on the surface of the body, most useful for communications. Many moons (and some inner planets) are tidally locked to their planet and will not have this node, but the Lagrange Point node between the moon and its planet will serve this purpose, keeping above the same point on a tidally locked moon. Some moons rotate slowly enough and/or have weak enough gravity that their synchronous orbit would lie well outside their sphere of influence.
Other Orbit Nodes: If there are other important orbits, they will be shown on the transit map as well. Most often, other orbit nodes represent things like major space stations. These are generally set in their own particular orbit (rather than one of the standard nodes such as Low Orbit) to minimize Kessler Crowding and other orbital traffic.
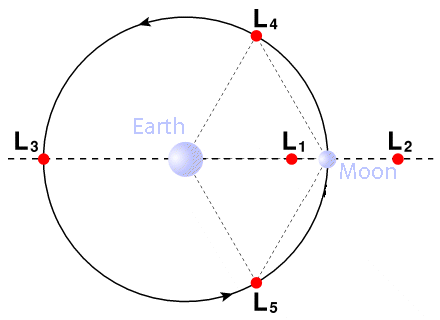
Lagrange Point/Ejection/Injection Node: The Lagrange Point is not exactly in orbit around either body it relates to, but rather orbits the system of both, with gravity and momentum canceling each other out in a specific way. Every body has a Lagrange Point with its parent body, and its node is depicted as the "intersection" of the transit path representing the planet's orbital system and the moon's. It is easy to get to both the local system and the larger one, being the connection between the two systems. It is often referred to as the Orbital Ejection/Injection Node when it is being skipped over as a part of the maneuver.
Travel Times
The following list may be used to estimate travel times between two nodes. If a single maneuver involves more than two nodes, use whichever single path takes the longest. On the other hand, if executing several maneuvers in sequence, then each time period must be waited on, one after the other. Saving time is another benefit of skipping nodes.
Travel in low orbit : Launching to low orbit around a planet or moon takes 3 × GRV minutes; launching to rendezvous with another vessel in Low Orbit will take around 2 hours.
Travel to moons : Traveling from a planet (or low orbit) to one of its moons will take 1/4 of the moon's orbital period.
Travel between moons : Traveling from one moon to another will take half the average of the two moons' orbital periods—this will normally be on the order of a week or two.
Travel between planets : Just like moons, traveling between planets takes half of the average of the two planets' years. Depending on the planets this could mean a few months to years. Hard Burns are usually employed to shorten this time to reasonable levels, but characters will often spend weeks at a time in transit.
Travel through a warp bridge : Once rendezvoused with the warp bridge, travel through it takes a couple of hours; however, to the traveler, it appears to be instantaneous.
Hard Burn
A pilot may choose to execute a maneuver as a hard burn to reduce the travel time—no sense in spending a decade to travel to Saturn if you've got the spare ΔV to shorten the trip! The pilot will thrust for longer than necessary at the beginning of the trip, burning more fuel, and will have to decelerate for longer at the end of the trip in order to not fly past his target. The ratio by which a hard burn reduces the travel time is exactly the same as the multiplier for the amount of fuel used—this number is called the Burn Ratio. If you spend three times as much fuel (a Burn Ratio of 3), the travel time is divided by three. Using a Hard Burn increases the Glitch Risk of the pilot test by the same number, the Burn Ratio.
The Burn Ratio available is limited by the amount of ΔV the pilot wishes to spend. In addition, it may not be higher than (TR + number of nodes skipped). If the Hard Burn factor approaches this limit, the ship's crew will experience gravity for most of the journey due to the acceleration. Ships with advanced drives and large amounts of ΔV may max out the Hard Burn factor solely to keep the crew under acceleration, which is more comfortable than free fall for most species. If this is your goal as a pilot, keep in mind that you may also use a lower TR than your ship is capable of.
Failures & Glitches in Travel
A failure on the Astronautics test will result in a botched maneuver, with the ship ending up at the wrong node. The resulting node will be somewhere in between the start and end nodes; generally, the number of hits shy of the threshold is the number of nodes away from the targeted node the ship will be. A glitch on Astronautics will result in maneuvering to a different, unexpected node entirely, chosen at random or by the GM. The resulting node should not be along the way to the original target node (if possible), and should consume the same or less ΔV to reach than the original target. If there are no other nodes that fit this requirement, then the vessel is simply in an irregular orbit and must spend that same amount of ΔV to correct it back to the original orbit before continuing on the journey.
A failure on a Deep Space Maneuvering test will waste fuel. For every hit shy of the threshold, the amount of fuel used is increased by 10% of the fuel cost of the maneuver. A glitch on the DSM test represents a hardware failure, dealing (TR) unresisted damage to the engine system being used; the ship's engineer can make an immediate PER + Crafting (Spacecraft Mechanic) test to see the problem as it happens and take emergency measures to minimize the damage, with each hit reducing the damage dealt by 2. (If the main test succeeded and there was a glitch, then this failure happens at or near the end of the maneuver, leaving them at the target node with the engine damage; if the test failed and there was a glitch, then this happens somewhere along the way.) If the damage is not dealt with promptly, the vessel is derelict on an irregular orbit.
Rendezvous & Docking
Rendezvous with another craft requires first being located at the same node or on the same path as the target vessel. This represents matching orbits with the target. Rendezvous with a target "resting" at a particular node is fairly straightforward and without complications: simply travel to the same node.
If attempting rendezvous with a target vessel on a path traveling the same direction, the "chasing" vessel must execute a maneuver using the Hard Burn option, as if it intends to reach the next node before the target vessel; by doing so, both vessels will be on the same path at the same time, and will meet at some point along that transfer. Attempting rendezvous on a path traveling in opposite directions requires the pursuing vessel to spend the fuel which that path would cost (even if, at the end of the rendezvous, the pursuing vessel would then be returning to their origin node).
In general, if multiple vessels are attempting to reach the same target along a path, whichever vessel burns with the highest Burn Ratio is likely to reach the target first. If the target is significantly closer to one node or the other, then obviously it will be easier for a pursuing vessel on the closer node to reach the target first. If that is the case, then the GM may use a multiplier on the Burn Ratio of the more distant vessel, using the ratio of time on either side of the target vessel as a guide for what this multiplier should be.
Example scenario : A target cargo ship is moving from node A to node B with a Burn Ratio of 2. This maneuver will take 4 weeks. Two weeks into this maneuver, a pirate vessel launches from node A with a Burn Ratio of 4, the minimum required to catch up to the cargo ship. A protective vessel is located at node B, and learns of the pirates one week later—giving the protectors 1 week to intercept the cargo ship before the pirates reach it. The GM sees that at this point the cargo ship is three-quarters of the way to its destination, while the pirates are only halfway there. He may rule that the protective ship only needs to maneuver at a Burn Ratio of 2 to beat the pirates there. This multiplier does not need to be precise, and the GM should use broad estimates to give a required Burn Ratio for intercept as quickly as possible, and move on with the story.
Once on the same node or path, one vessel or the other must perform a Deep Space Maneuvering test with a threshold of 2 if rendezvousing at a node. If rendezvousing along a path, the threshold is the difference between the Burn Ratios taken by the two vessels. For example, if the target vessel executed a maneuver with a Burn Ratio of 6, and the pursuing vessel executed the same maneuver with a ratio of 10 to catch up, the threshold will be 4. After this test is completed, the vessels are considered to be in Rendezvous Range.
Once within Rendezvous Range, docking is an option, requiring a REA + Pilot (Precision Space Craft) test with a threshold of 3. Docking with a vessel requires that the target vessel be either cooperative, immobilized, or unaware of the docking attempt; even the tiniest amount of movement will cancel the docking attempt.
On the more exciting side of things, direct ship-to-ship combat is also an option when within Rendezvous Range; see the "Guns and Ships" chapter on Combat for more information. Note that drone missiles may be used from any range their ΔV allows; they are vehicles that explode, and will traverse the required nodes on their own.
Engine Technologies
Every vessel has engines, usually multiple sets. Every engine has its own characteristics, strengths, weaknesses, and technology requirements.
Liquid Chemical Engines (C)
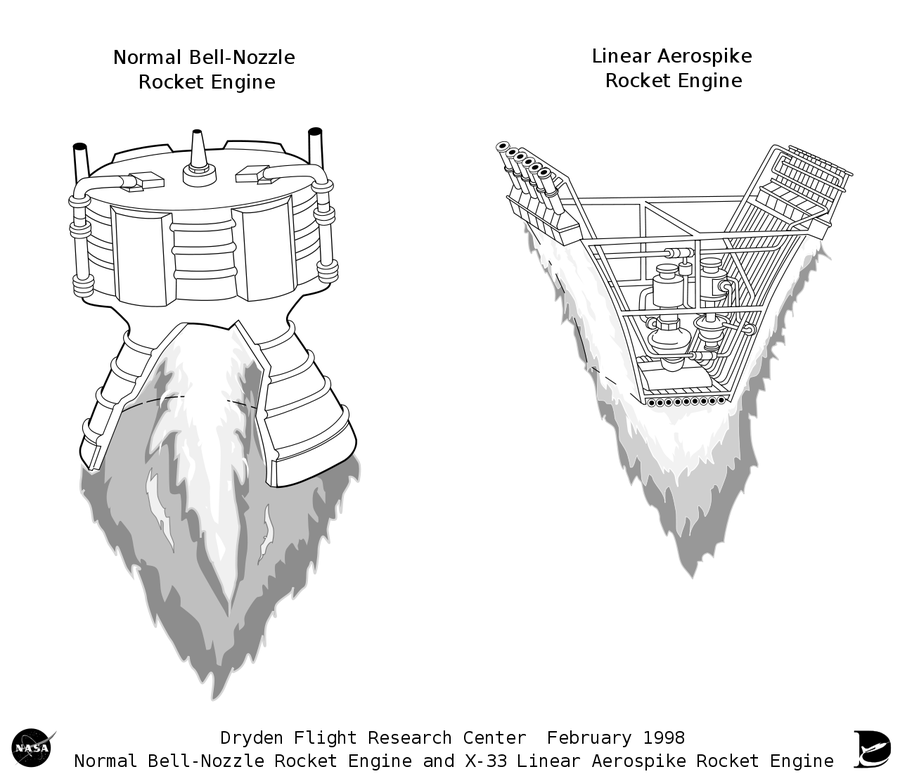
Chemical or combustion engines use the same general technology as the engines developed by NASA in the mid-20th century. Fuel (often liquid hydrogen, methane, or another combustible fuel) combines with an oxidizer (generally liquid oxygen) and burns; the continuous explosion propels the craft forward. There are two varieties of liquid chemical engines, distinguished by the shape of the engine. The most common kind, reliable and easy to produce, are the bell-shaped engines common to spacecraft of the 20th century. In the mid-21st century, the aerospike engine is popularized for spacecraft designed to fly both in atmosphere and vacuum, as it is capable of maximizing its efficiency in both environments. The chemical engine is powerful and versatile, but not particularly efficient; this kind of engine is generally best used during liftoff and fine maneuvers, but generally does not provide enough ΔV to be used for more than short bursts without completely burning out.
Solid Rocket Motors (S)
Though using the same basic chemistry as liquid engines, solid rocket motors use solid fuel and require less complex, heavy, and expensive hardware compared to liquid-fueled engines. This comes at a cost of versatility: it is fundamentally impossible to throttle down or disengage a SRM after it has been lit. Thus, this kind of propulsion is only used in launch boosters. It falls out of style during the early 21st century as liquid-fueled boosters become able to land themselves propulsively and fly again, rendering the cost advantages of the SRM obsolete.
Maneuvering Thrusters (M)
Small, fast-response thrusters designed to provide small bursts of movement, useful for small rotation and translation. These typically use hydrazine, a single-component fuel that reacts when passed over a catalyst, giving fine control over thrust timings, crucial for maneuvering actions. (It's worth noting that hydrazine is toxic and dangerous to handle, so damage to the maneuvering thrusters may cause health issues among the crew.) Though ineffective for actual movement due to low efficiency, these thrusters are generally required for the precision maneuvering involved in docking. (Magnetic field drives are also appropriate, if they can be used.)
Nuclear Pulse Engines (P)
The nuclear pulse engine is surprisingly simple, but provides incredible thrust at high efficiency. The ship has a massive push plate on the back with a small hole. A nuclear bomb is released through the hole, and detonates a calculated distance away from the plate. The force of the nuclear explosion propels the ship forward, and the pusher plate spreads this force over time via pneumatics. Then the process is repeated. Nuclear pulse engines are crude and hugely dangerous for any surrounding vessels, for obvious reasons; if used regularly, they also wreak havoc on nearby worlds, irradiating them. Generally, they are banned in any inhabited area. Additionally, there is a minimum viable size for this kind of engine due to the nature of nuclear fission, and it is large (only suitable for E class vessels). The only usage that ever gained traction for this kind of engine is for one-way colony ships to remote worlds; the massive force generated allows huge amounts of cargo to be carried in one trip. Even in this use case, care is taken to ensure that the pulse engine is not used within a certain range of the colonization target, lest the engine irradiate the land.
Ion Engines (I)
These low-powered, hyper-efficient engines rely on a process where the reaction mass is electrified and run through an electric field. The magnetic repulsion of the molecules sends them off at high speed and pushes the craft gently in the other direction. Ion engines have high power requirements, so until the advent of nuclear fusion, are generally only useful near stars with solar panels.
Fusion-Ion Engines (F)
Quite simply, a fusion-ion engine is nothing more than an ion engine powered by an onboard fusion reactor. The combination of high-efficiency engines with a portable, powerful energy source is a potent one, and these engines become standard issue across many fleets. The first fusion-ion engines do not have as much thrust as chemical engines, but advances in the technology increase their power output without sacrificing efficiency, and chemical engines are soon obsolete.
Magnetic Field Drives (+)
The Magnetic Field Drive uses a powerful electromagnet to generate force by pushing off the magnetic field of a planet. In order for this to be effective, the magnetic field must be particularly strong, as the magnetic field of Kennesawu is. Even with such a strong field, this drive is still not strong enough to counteract the pull of gravity, and launching to orbit requires additional propulsion of some kind. However, once in orbit, the advantages are immense, as this drive requires no reaction mass, and propulsion can be generated by solar power alone.
The limited range of usage of this propulsion means it has only meaningfully been developed for use by the Guigu, and even the Guigu did not really develop the technology, but instead harvested the naturally evolved organs of the Symtraya to achieve space travel.
Gravitic Engines (G)
This highly advanced form of propulsion uses huge amounts of energy to simulate an artificial mass in front of the spacecraft, pulling the craft forward. While not as efficient as ion drives in many ways (depending on the power source), the gravitic engine has a huge advantage in that it does not cause G-force from acceleration. This enables gravitic-powered ships to accelerate far more quickly than other crewed ships, and can even change acceleration direction instantaneously, outmaneuvering the tracking systems of guided missiles. This kind of engine is first discovered on Lemuria, and has yet to be manufactured by any known extant race.
Orbital Sensors
"Sensors" is simply a collective word for telescopes, radio dishes, and specialized equipment used to gain information at long range. All sensors used in space operate on one of three mediums: electromagnetic radiation, gravity detection, or particle detection. If on the surface or in atmosphere, vibration is also available as a medium.
Electromagnetic Radiation Sensors
Electromagnetic radiation consists of a wide variety of emissions that behave the same way. It travels at the speed of light, and is generally blocked by solid objects (e.g. planets and moons). When emitted naturally, the quantity of light falls off quickly over distance, as it spreads over a wider area with every meter further from the source. All kinds of EM radiation may instead be emitted as a laser, a collective beam of light which retains its strength over longer distances.
Radio Signals
Radio signals, used largely for communications, exist with wavelengths about 100 mm and longer (extending up to many kilometers). These frequencies are not especially useful for radio telescopy of natural sources, but strong radio signal sources tend to stand out as being artificial.
Low Energy Emissions (Radio Telescopy)
Low-energy sources may emit radio waves, in the range of about 1 mm to 100 mm, which are easily transmitted, easily collected, and easily blocked. This form of radio is more likely to come from natural sources, including both stars and smaller, cooler objects.
Infrared
Detecting infrared radiation is handy for determining temperature. While any wavelength may provide this information, infrared light has the most useful wavelengths for determining temperatures that are near the survivable range of water-based life; an object will tend to glow at shorter and shorter wavelengths when hotter, while most objects (including cool ones) will "glow" at longer wavelengths such as radio.
Visible Light & Ultraviolet
In short, visible light is electromagnetic radiation between the wavelengths of 390 nm and 700 nm—visible to most species which evolve under yellow sunlike stars. Ultraviolet is a shorter wavelength than visible, down to about 10 nm, and is visible to some species. Ultraviolet radiation can cause surface/skin burns in some species (including Humans).
Ionizing Radiation (Gamma Rays, X-Rays)
The shortest wavelength of radiation is also the most energetic, and the most dangerous. Ionizing radiation is the kind of radiation that carries with it enough energy to damage DNA, potentially causing cancer and other forms of radiation poisoning. This is the kind of radiation that is referred to by the RAD environmental attribute.
Laser Microphone
Based on a spy gadget available since the 20th century, a laser microphone reflects a beam on the hull of a ship to detect the vibrations of the hull and hear the activity inside. When used on any vessel, very useful information such as engine and weapon status can be deduced from these vibrations; the threshold for perceiving such information is 4, and the vessel must be in Rendezvous Range. Picking up on conversation and other noise made by the occupants of a vessel is much more difficult thanks to the layers of thermal and atmospheric insulation on a vessel; this threshold is 7 for C-class vessels and below, and 10 for D-class or above. (Each of these thresholds is reduced by 2 if the vessel has no other ambient noise present, such as if the engines and life support are disabled.)
Spectrometer
A spectrometer gathers light from the target being observed and determines the elements that comprise it. Different elements have emission spectra (for light sources) and absorption spectra (if the light passes through or reflects off of something, such as atmosphere or surface), and it is common practice to analyze these spectra to determine the elements present. This may lead to valuable information, such as the ship class or origin of a vessel, the types of engines used, and so on.
Gravity Detection (the La Verrier Technique)
Gravity detection requires CPU TL 9. This is not a sensor device in and of itself; rather, the computer accumulates extremely precise position data from various sources, and infers the effect of minuscule gravitational forces on the positions of those objects; from there, it calculates a solution of masses and positions that could explain all of the observed forces. It is only useful for detecting large bodies, and cannot provide any information other than approximate mass and location. At CPU TL 9, celestial bodies (dwarf moons and larger) can be detected and charted using these sensors, and no test is required; with this technology only a few hours of observation are needed in order to completely chart a solar system after arrival. At CPU TL 11, E-class vessels can be detected; the threshold for their detection is (10 - BOD).
Observing movements for a longer period of time can reduce the required CPU TL of the test. Consult the following table to find the amount of the reduction. Making long-term observations is what allowed people before proper computers even existed to work out the positions of as-yet-undiscovered planets in the outer solar system, as Urbain La Verrier had done in the 19th century to predict the existence of Neptune by observing perturbations in Uranus's orbit.
| 1 month | -1 |
|---|---|
| 6 months | -3 |
| 1 year | -5 |
| 5 years | -6 |
| 10 years | -7 |
Particle Sensors
Neutrinos
A neutrino telescope is one of the few pieces of equipment that can see through celestial bodies. Neutrinos are emitted almost exclusively by nuclear reactions, and pass through nearly all matter—planets included—while rarely interacting with it. Stars are naturally the largest source of neutrinos, and at PHY TL 5, a neutrino scope can detect stars through planets. However, at that TL, neutrino scopes are a massive and heavy piece of equipment. Due to practical limitations and the fact there are much easier ways to tell a star is in the system, neutrino scopes at that level are generally only placed on scientific research and charting vessels.
At PHY TL 7, while still large and heavy, they become sensitive enough to detect fusion reactors of large (E-class) vessels (as well as fusion reactors on the surface of planets, and nuclear explosions), and become useful to the military to become a standard sensor on capital ships. At PHY TL 9, there are small detectors (installable on C-class or larger vessels) that can detect E-class reactors, and larger (installable on D-class or larger) detectors become sensitive enough to detect D-class reactors. The threshold for detection of any of these reactors is (10 - BOD) if the vessel is in the lowest Size Class the sensor is capable of detecting.
The resolution of neutrino scopes remains poor regardless of tech level; it is not able to discern the exact position of the objects it detects in any more detail than "somewhere behind that planet." Fleets of ships are also indistinguishable, and tend to read as one large neutrino source. Once neutrino scopes become common, backup non-nuclear generators and capacitors are often installed in ships meant for stealth; since neutrinos are only emitted in nuclear reactions, non-nuclear vessels or those whose reactor is powered down are invisible to neutrino scopes.
All neutrino scopes are capable of detecting the imminent explosion of a supernova several hours prior to its apparent explosion. A supernova explosion begins at its core, and the light and energy from that reaction takes many hours to reach the surface, bouncing around among the matter that makes up the star. The neutrinos, meanwhile, pass right through that matter, providing an advance warning of the supernova.
Warp Bridges
A warp bridge is a paired miniature singularity (another term for black hole) that connects to a wormhole bridging two points in space. It is generally believed that they were artificially created. The endpoints of the bridge orbit around planets or suns just like any other celestial body. Their mass is comparable to that of small moons.
Warp bridges cannot be traversed without specialized equipment, a system known as a Junardm. The Bactarans have the only known source of Junardms in the Orion Arm, and they keep it a closely guarded secret. Without this device, no matter actually goes across the bridge, instead simply getting sucked into the singularity. No radio or communication signals cross the bridge. Communication is only possible by sending a courier vessel through. This makes bridge travel inherently dangerous, as it is virtually impossible to either detect or avoid an ambush if there is one waiting for you on the other side.
While warp bridges are singularities and create relativistic (time dilation) effects, these effects are small to the point of infinitesimal on the scales at which they are interacted with. Long before any ships can get close enough to the event horizon to experience time dilation, the tidal forces of the black hole will destroy the ship.
Appearance
The first thing one sees when approaching a warp bridge is a faintly pulsating ring—the stabilizers. Every warp bridge has between 3 and 8 tiny objects orbiting around them in an incredibly tight, fast orbit at about a 1 kilometer radius. They are so named due to the theory that these objects somehow stabilize the singularity from evaporating away due to Hawking radiation. The mechanism by which the stabilization occurs is unknown.
These stabilizers orbit at blindingly fast speeds, appearing to most eyes to be simply a solid, light-colored ring. Their orbital velocity is over 600 km/s, and they fly around the singularity roughly 100 times a second. This makes encountering them or targeting them with weapons essentially impossible, though even the few times a weapon has succeeded at hitting one, it has dealt no discernible damage to the stabilizer, only catastrophic damage to the impactor.
The singularity in the center creates a lensing effect, bending light around it with its gravity. Due to the small size of warp bridge singularities, this effect is nearly impossible to notice visually until you are right on top of it; the lensing effect is only about 50 meters wide. (The event horizon of such a small singularity is just a few meters.)
Stabilizers
More than merely stabilizers, the orbiting objects seem to protect the warp bridges. There is an upper limit of about 30,000 metric tons (roughly equivalent to three class D10 vessels) that is "permitted" to pass through the bridge at any given time; any time more mass is on course to enter the singularity, the stabilizers project powerful forces to move some or all of the mass off course, often vaporizing the mass in the process. It is theorized that too much mass passing through the bridge at once could destabilize the bridge, and this behavior prevents that.
In 2108, the Sirius-Mintaka warp bridge was destroyed when two armadas—each just below the mass threshold on their own—entered the bridge simultaneously from opposite ends. Both armadas were annihilated, absorbed into the singularity as if they never existed at all. The instant this happened, a surge of increased gravity altered the orbits of every body in both systems, giving observers on both ends the first sign that something was wrong. This surge was not enough to knock any planets out of orbit, but it did destabilize the orbits of a number of asteroids and moonlets. The orbit of Fazon, a moon in the Mintaka system near the Sirius bridge, was significantly widened in the incident.
Following the gravity surge, the stabilizers' behavior began to change. Within a few hours, the orbits of the stabilizers (on both ends of the bridge) were elliptical and highly eccentric; a few hours longer and the familiar 2km pulsing ring shifted to a 4km-wide rosette shape, until finally the periapsis of the stabilizers dipped inside the event horizon, and they vanished. The singularities on both ends of the bridge remained, but never functioned as a bridge again.
There is evidence that at least one other warp bridge in the Orion Arm Network has also been destroyed at some point. A singularity about the right size to be a warp bridge—one without a ring of stabilizers—is known to exist in the Sirius system. It is suspected this was once a warp bridge that collapsed long ago, in the same way the Sirius-Mintaka bridge collapsed. This singularity, however, has been found in a far different orbit than the other warp bridge singularities. This suggests to some that the similar size to the warp bridges is a coincidence. To others, it suggests the orbit of this singularity was destabilized after it lost its ring of stabilizers, lending credence to their assumed functionality. Debate rages.
Junardm: Bridge Traversal Device
Making use of a warp bridge requires a particular piece of equipment called a Junardm by the Bactarans. These devices are incredibly advanced and not easy to come by. In general, only Bactarans have access to them at all (selling them to other species at high cost), and they keep their source of the devices a closely guarded secret.
The appearance of the Junardms is like nothing any extant civilization has devised, making it clear to even casual observers that Bactarans did not build the devices themselves. The shape is a thick disc, plain metal on one side (the side which is welded to the vessel) and a complex, shimmering, shifting pattern of blue and silver on the other. It is made from an alloy of metals known in no other technology.
Misusing a warp bridge is certainly possible: trying to enter one without a functioning Junardm, entering at the wrong orientation, or failing the required Pilot test will all result in extensive damage to the ship from the singularity's tidal forces, if not outright and immediate destruction. Much of the debris will be absorbed into the singularity, and other debris will be flung out at extreme speed in mostly random directions. There is a black hole at the center of the thing, after all, even if it is a small one.
A single Junardm can transit approximately 10,000 metric tons through the bridge, or a ship up to D10 in its BOD rating. This is approximately one-third of the maximum capacity of a normal warp bridge.
When traversing a bridge, the vessel may approach at any velocity. The direction of travel must be directly towards the center of the singularity and, on approach, the Junardm must be facing the singularity. During approach, the Junardm creates a glowing blueish field in the shape of an elongated hemisphere encompassing the ship. A fraction of a second before the Junardm contacts the singularity, the field flashes, contracts within the Junardm (taking the mass of the vessel with it), and then finally the Junardm shrinks and disappears into the wormhole. On the other side, the Junardm appears first in a flash, and the remainder of the ship flashes into existence a fraction of a second later, with the Junardm facing the wormhole from which it emerged.
Origin of the Warp Bridges
What do we really know about the origin of the warp bridges? Not much. The most obvious point is that they were constructed by an incredibly advanced civilization, one that no longer exists. The stabilizers are an advanced technology that does not grant much useful information, especially given their inaccessibly tight orbits. Even the Junardms (the exact origin of which is shrouded in secrecy by the Bactaran House Torme, which supplies them) are too advanced for us to be able to reverse-engineer anything useful out of them. There are, however, some hints to the origins buried in the subtleties of the network itself.
As the Orion Arm network was charted, astronomers began to notice a distinct lack of young stars as the parent bodies of warp bridge endpoints. The youngest star system was just over 500 million years old, giving a possible limit to the age of the network. As there are a number of prominent nearby stars with ages from 10 to 200 million years which are suspected to make good candidates for warp bridges, it is believed that the network is approximately 200 to 500 million years old.
There is evidence that the network was created by life forms that are chemically similar to most of the known life forms—that is, dependent on chemicals like carbon, and liquid water. Nearly every warp bridge is located in a system that has a planet or moon that provides these conditions. The few exceptions to that rule may provide further evidence for the age of the network—Drysar being a prime example.
Drysar has no planets in its inner solar system. Drysar is a white dwarf, the remnant of a red giant that exhausted its fuel; it is accepted that during the time the star was a red giant, any planets in its inner solar system (what used to be the star's habitable zone) were swallowed by the star. The star became a red giant about 250 million years ago; if there ever was a habitable planet in that system, it has been gone at least that long.
Another warp bridge, dubbed Overview, is a rogue body (that is, not orbiting a parent star) high above the plane of the Milky Way. Tracing its path backwards through time suggests the singularity was gravitationally ejected from the plane of the galaxy between 50 and 100 million years ago; and thus the network must be older than that.
Although the advanced technology used makes it less than certain, there is no evidence to suggest the civilization that built the network had any other form of faster-than-light travel (indeed, there is no evidence that FTL travel is even possible aside from wormholes). Thus, it is believed the network itself must have been constructed at sublight speeds. The size of the Orion Arm Network spans about 2000 light-years, suggesting that the civilization had that level of technology for at least that long (or likely longer) before it fell.
The evidence suggests that, nearly half a billion years ago, there lived an advanced carbon-based civilization that spanned the Orion Arm. Some civilization-wide calamity caused not only their extinction, but the eradication of most of the physical evidence they ever existed—except for the warp bridges themselves.